Valve design is a critical aspect of many industries, from automotive to aerospace, and from chemical processing to water management. A well-designed valve can enhance system efficiency, improve safety, and reduce maintenance costs. In this article, we will explore the art and science behind valve design, highlighting key considerations and best practices.
**Introduction**
Valves are mechanical devices that control the flow of fluids through pipelines. They are essential components in various systems, including water supply, oil and gas transportation, and industrial processes. The design of a valve can significantly impact its performance, durability, and reliability. Therefore, understanding the principles of valve design is crucial for engineers and designers in multiple fields.
**Types of Valves**
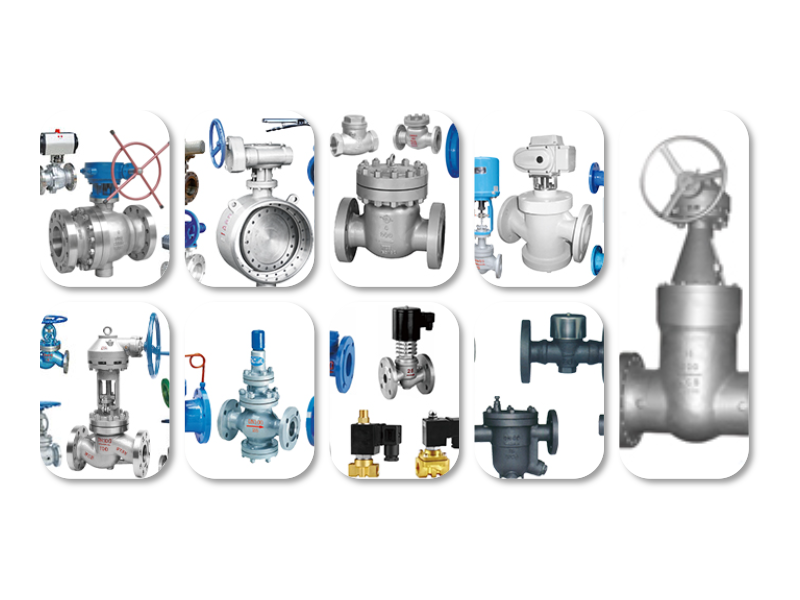
There are several types of valves, each designed for specific applications. The most common types include:
- **Globe Valves**: These valves are used for on/off control and throttling. They have a spherical disc that moves up and down to control the flow.
– **Check Valves**: Check valves prevent backflow by allowing flow in one direction and blocking it in the opposite direction.
– **Diaphragm Valves**: These valves use a flexible diaphragm to control flow, making them suitable for corrosive or abrasive fluids.
– **Ball Valves**: Ball valves have a hollow, perforated ball that rotates to control the flow. They are ideal for high-pressure applications.
**Key Considerations in Valve Design**
Several factors must be considered during valve design to ensure optimal performance:
- **Material Selection**: The choice of material depends on the fluid being handled and the operating conditions. Materials such as stainless steel, cast iron, and plastics are commonly used.
– **Pressure and Temperature Ratings**: Valves must be designed to withstand the pressure and temperature of the fluid they will handle. This is determined by the material properties and the design of the valve.
– **Flow Characteristics**: The valve design must accommodate the flow characteristics of the fluid, including viscosity, density, and flow rate.
– **Sealing Mechanism**: The sealing mechanism must prevent leaks and maintain integrity under various conditions. Common sealing materials include rubber, PTFE, and metal alloys.
– **Actuation**: Valves can be manually operated, actuated by pneumatics, hydraulics, or electric motors. The choice of actuation depends on the application and requirements.
**Best Practices in Valve Design**
To ensure a successful valve design, engineers should follow these best practices:
- **Thorough Research**: Understand the application, fluid properties, and operating conditions. Research similar valve designs and identify potential challenges.
– **Collaboration**: Work closely with other engineers and stakeholders to ensure that the valve design meets all requirements.
– **Simulation and Testing**: Use simulation software to analyze the valve’s performance under various conditions. Conduct physical testing to validate the design.
– **Documentation**: Keep detailed records of the design process, including calculations, simulations, and test results.
– **Continuous Improvement**: Stay updated with the latest advancements in valve design and technology to improve the design over time.
**Conclusion**
Valve design is a complex process that requires a deep understanding of fluid dynamics, materials science, and engineering principles. By following best practices and considering key factors such as material selection, pressure ratings, and flow characteristics, engineers can design valves that enhance system performance, safety, and reliability. As industries continue to evolve, the importance of effective valve design will only grow, making it a crucial skill for engineers and designers in various fields.